Nikon D7500 4K Video Settings – Best practise explained step by step

In this manual I will explain the settings I use to record videos on the Nikon D7500 and why I use these settings. So you can create clear video with high recording quality with your D7500.
The complete manual as video
Reading’s not your style? Here you see all settings with explanation in the video.
Ihre Daten werden erst beim Abspielen des Youtube-Videos an den Dienst übermittelt. Your data will only be transmitted to the service when you play the Youtube video.
Setting the Camera to M Mode
This mode gives us full control over both exposure time and aperture.
Choosing the right shutter speed
When creating videos, the shutter speed must always be set in proportion to the video material being made and its frame rate.
As exposure time I use 1/60, because I usually shoot videos later with 30 frames per second (30p), more about that later.
If you use other frame rates, like 60p, 50p, 30p, 25p or 24p, you have to adjust the shutter speed to the next suitable value. Here again the overview:
| Framerate | Shutter speed |
| 60p | 1/125s, as there is no 1/120s |
| 50p | 1/100s |
| 30p | 1/60s |
| 25p | 1/50s |
| 24p | 1/50, as there is no 1/48s |
Attention: Please also note the section “Flicker reduction” in this context.
Choosing the right aperture
Which aperture you choose is up to you, depending on how you want to present your motif. If you choose a lower aperture, the background of your motif will blur due to the shallow depth of field, making your motif more prominent.
With a higher aperture, the background of your motif is sharper due to the high depth of field and the entire image is characterized by a high depth of detail due to continuous sharpness.
Note that if you choose a higher aperture, the image itself becomes darker, and if you choose a lower aperture, the image becomes brighter.
The only important thing at this point is that we have control over the aperture, because we use the M mode of our camera to do this. If we were to let the camera control the aperture in A mode, the camera would change the aperture depending on the light situation while shooting and we would take a shot with varying depth of field and brightness all the time. Not only does this look unprofessional, it’s also really annoying for the viewer.
Movie Shooting Menu Settings
For all the following settings, we switch to the movie recording menu. The settings stored there only take effect when we operate the camera in movie mode. I don’t proceed here in the order of the menu entries, as for example some settings are already adjusted automatically by the selection of the resolution and frame rate and we don’t have to deal with them anymore.
Choosing the correct frame size/frame rate
I make my own video recordings in 4k with 30 frames per second.
At 30 frames per second, movements in the picture look most natural and smooth, and 60p shots of action cams can be integrated very easily, for example to create slow-motion functions.
Therefore, I first select the setting “3840 x 2160; 30p” in the film recording menu under “Frame size/frame rate”.
With these settings, the “Choose image area” is changed to “DX” by default, the movie quality is thus automatically set to “High” and the digital VR is off, so we don’t need to deal with these menu items anymore.
Note: To be honest, nobody buys a Nikon D500 or D7500 to make bad videos, I myself never understood why there is the possibility to set the movie quality to “Low” at all.
ISO sensitivity settings
Now you can decide how you want to proceed and whether you want to make the ISO settings manually or automatically. In the menu entry “IOS Sensitivity Settings” you can select if the automatic should be used in the field “Auto ISO control (Mode M)”.
• If you are recording a video in an environment where the lighting conditions in the subject will not change, you can manually adjust the ISO settings and then leave them at the correct value.
• If you have to assume that lighting conditions will change during shooting, for example because a person moves in the picture and their illumination varies, use the ISO automatic.
• If you are simply lazy, regardless of the ambient light conditions, you also use the ISO automatic. Seriously, ISO auto works reliably and doesn’t cause any image distortion if the ISO number changes during shooting. Actually, you can use the ISO automatic with a clear conscience.
There is one thing that needs to be considered with regard to the ISO automatic. Set the “Maximum sensitivity” value to “10,000”. Above this value, the image quality can suffer from noise and color noise, so we only allow the ISO automatic to operate up to this value.
White balance
Almost the same applies here as with the ISO automatic.
Actually, the automatic white balance is sufficiently reliable. I use it in 90% of all shots.
Picture Control
Here I select the setting “FL Flat”.
This preserves details over a wide range of tonal values, which maximizes the optimization potential in later post-processing, i.e. you can get the most out of this profile afterwards.
Active D-Lighting
Off. I don’t want the camera to manipulate the image independently.
High ISO NR
Here we leave the default value “Normal” set.
Flicker reduction
The flicker reduction is intended to avoid flickering in the image, which can be caused by artificial lighting. Depending on the frequency at which the local power grid operates (50Hz in Germany), some light sources tend to emitt the normal fluctuations in the power grid, so that you will notice them when recording video at that light.
The automatic flicker reduction delivers good results. Sometimes, however, it also fails, this can happen in very bright environments, for example.
To counteract this, you can take the following measures:
- Manual setting of the flicker reduction to 50Hz or 60Hz, depending on which setting gives the best result.
- If the flicker reduction is not enough, you may need to adjust the shutter speed, even if this would violate the above recommended shutter speeds.
o1/125s, 1/60s or 1/30s at 60Hz power grid
o 1/100s, 1/50s or 1/25s at 50Hz power grid
Microphone sensitivity
When I use the built-in microphone of the D7500, I use the automatic level.
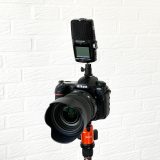
If I use an external microphone such as my Zoom H2n, I manually level the microphone input.
You can find more details about external microphones in this blog post “Zoom H2n as an external microphone on the DSLR”.
Frequency response
Here you can choose between “Wide” and “Voice”. I personally don’t like the sound of the “Voice” setting in speech at all and therefore use the much more natural sounding “Wide” frequency response, no matter if I record with the built-in microphone of the D500 or my Zoom H2n as an external microphone. You can find more details about external microphones in this blog post “Zoom H2n as an external microphone on the DSLR”.
Wind noise reduction
The wind noise reduction settings only work when we use the D7500’s built-in microphone.
- If I record in locked, windless rooms, I switch off wind noise reduction as a potential source of error.
- If I record outside with the built-in microphone, I activate wind noise reduction.
Digital VR
Off, because this setting is not available due to the 4K recording.
Time-lapse recording
Off, because no one who seriously wants to take time-lapse shots has them recorded by the camera as video, but rather composes the film from individual photographs.
Which memory card is suitable for 4k video?
So that your camera can pack even high data rates quickly on the memory card, you should rely on a correspondingly fast SD card.
I myself use the following card:

- Professionelle Leistung für schnelle Aufnahmen und 4K UHD Videos mit der SanDisk Speicherkarte; Im Lieferumfang inbegriffen ist die...
- Dank der schnellen Übertragung von bis zu 170 MB/s warten Sie nicht mehr lange, während Ihre Bilder und Videos auf Ihre SD Karte oder...
Record video – what do I have to do?
Now it’s getting easy. At the bottom right of the display you will find a toggle switch with a photo and a video symbol. Toggles this switch so that the video mode is active. Now switch on Live-View and you will see the camera’s field of view in 4K mode on the display. By pressing the red “Record” button on the left under the release button, you start and stop the recording.
My first choice as a Lightroom alternative
I’m gonna do some advertising. I’ve been dealing with all kinds of image editing software for months, comparing a lot, testing a lot and finally choosing RAW developer and Lightroom alternative Luminar 3.
Have a look and try the free trial version. Just click on the banner:

All the links in this text are Amazon Affiliate Links, and by clicking on an affiliate link I will earn a percentage of your subsequent Amazon purchases. However, this circumstance does not influence the background of my product recommendation. This product recommendation is independent, honest and sincere.
Bei allen genannten Links handelt es sich um Amazon-Affiliate-Links. Durch einen Klick auf einen Affiliate-Link werde ich prozentual an Euren darauf folgenden Amazon-Einkäufen beteiligt. Dieser Umstand beeinflusst aber nicht die Hintergründe meiner Produktempfehlung. Diese Produktempfehlung erfolgt unabhängig, ehrlich und aufrichtig.


Reinhard Maag
Hi Daniel, much appreciated learning material. I changed from the Youtube to your blog because I couldn’t whisper. …Daniel, APERTURE is not pronounced as you do. The first syllable is stressed. Nörgelei, sorry. But then, EN is a second language for me as well. I do recall my bloopers and being not corrected by many (EN speakers are way more tolerant then say native FR speakers). My linguistics prof occasionally set things right, and I appreciated. Thanks again for the tutorial(s) and best!! — Rr
Daniel (Pixelfriedhof.com)
Hello Reinhard,
thanks for reaching out and for your advice. In the meantime I already learned the correct pronounciation and I‘m quite embarassed I did it wrong in my videos (despite some other wrong words and abbrevioations) but on the other hand I don‘t want to reupload the video as it might loose reputation in Google or Youtube search – and because I‘m quite lazy. 🙂
I‘m a great fan of constructive feedback like yours. It‘s the only way one develops over time and I‘m thankful for your advice. Best regards from snowy, northern Germany, Porta Westfalica, stay healthy
Daniel
Danielle
Why does the camera shoot in 4.30 second clips only? How can I make it record a 30 minute video in one file? Thanks!