Cheatsheet: Basics of Astro and Timelapse Photography
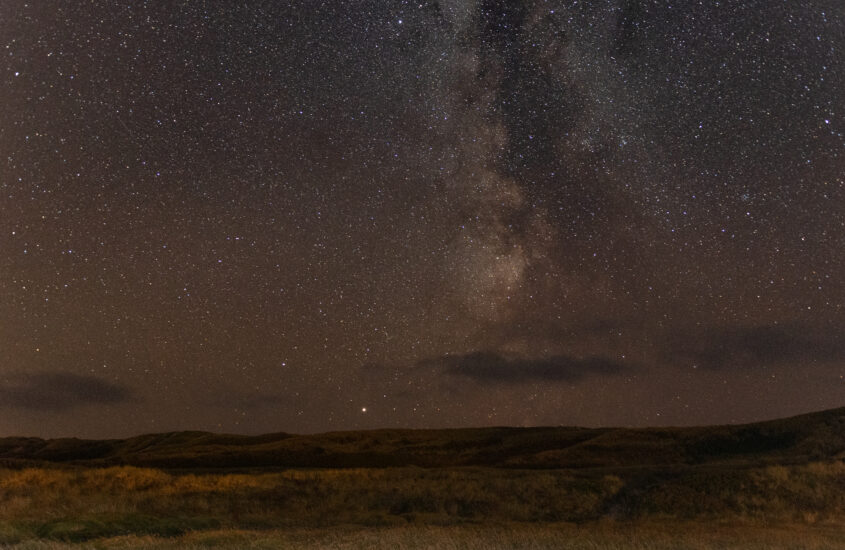
In this post I write about my basic settings and procedures for astrophotography and creating timelapse scenes. This post was originally my own note for photographs of stars or the Milky Way.
Basics
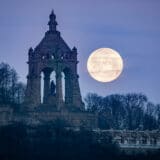
When photographing stars or the Milky Way, we have very little light available. Thus, we have to expose for a very long time. The problem is that we cannot expose infinitely long, because then the stars would no longer appear as points but as lines, after all they are “moving” all the time.
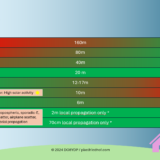
Due to the Earth’s rotation, it can be said that all images of stars appear as a line when the exposure lasts longer than 25 seconds.
The trick is to set the camera so that we capture as much light as possible in under 25 seconds. To make this work, we can make things easier with the ISO setting. A high ISO value ensures that we have to expose for a shorter time, while at the same time a higher ISO value ensures higher image noise.
Basically, you can say that astrophotography is the constant search and optimization of compromises. This is photography in general, but nowhere is it as obvious as in astrophotography.
How much noise an image has at which settings or how much light enters the lens in which time is always strongly dependent on the hardware used. This article is therefore not a patent remedy for successful photos. Rather, it is a guide for the basic setting of your setup, from which you can then adjust your equipment so that you get good pictures.
One shot vs. Timelapse
Photographing the night sky with one shot is easy: Setup, point, shoot, optimize settings, repeat until the result fits your expectations.
Doing timelapse movies is more difficult, and doesn‘t set you free from the steps before. You will need a setup timer that helps you to trigger the camera in special intervals.
Shooting timelapse scenes becomes even more complex when you are shooting them within changing lighting, for example from nighttime into the daylight, because you would maybe have to change settings during the shooting to prevent the image from over- or underlighting.
Using the right lens
For astrophotography we use very fast lenses, which let in as much light as possible with the largest possible aperture.
My favorite lens on the DX (APS-C) camera has always been the Sigma 18-35mm 1.8 Art *.
On my full frame Nikon Z6II * I use the Nikon Nikkor Z 20mm 1.8 *.
Both lenses are wide-angle lenses due to the focal length, which are able to capture a large part of the sky and/or the surroundings with their field of view.
Setting the right aperture
Since we want to let in as much light as possible, as described before, it only makes sense to work with these fast lenses with almost open aperture. So open the aperture as much as possible.
In special situations, for example when the landscape in the corners of the image is to be made even sharper, it makes sense to reduce the aperture by one or two stops. Of course, this is at the expense of the exposure time.
Setting the focus
We should focus on the stars. To do this, we use Live View, then zoom in on one of the brightest and most central stars in the frame and focus on it manually. The autofocus remains off.
Which Whitebalance to use?
I use the white balance for the cloudy sky. I make the adjustment later in post-processing. It is important that the white balance is not switched back and forth by the camera by an automatic during the shooting. Therefore manual white balance to relatively balanced color temperature.

RAW or JPEG?
You shoot in JPEG? Please find another hobby.
Number of frames, shots, interval and duration
The earth rotates permanently under the starry sky, therefore our recordings must not take too long, otherwise the stars will no longer be recorded as points, but as lines. 25 seconds is a good starting value, since the stars do not blur into lines up to this value. But less exposure time is better, because the image will appear sharper. So if you can get by with your camera at a higher ISO value with only 20 seconds without the higher ISO setting leading to too much image noise, you can be happy.
Time-lapse photography is time-consuming. A 3-hour photography action later turns into 12-second time-lapse video – just enough for a short insert in a travel report.
But how many shots do we actually need to get a smooth time-lapse later?
I create most of my videos in 30p, which is 30 frames/images per second. TV shows are also produced at this frame rate. Movements are displayed very smoothly here. Thus, I need 30 frames per second of film.
Some people also create their videos with 24p, like in the cinema. I don’t, because all the computing with 30p is more pleasant and easier, besides most of the rest of my cameras produce 30p and therefore I don’t want to make an exception here.
Logically, the interval between the exposures cannot be smaller than the exposure time of a single exposure. The camera still needs some time to complete the individual exposure and finally store it on the memory card. If it does not have enough time for this after an exposure, the camera’s exposures end up in the intermediate memory, the so-called buffer, and are then only written to the memory card after a delay. In the worst case, the recording interval is then interrupted at some point due to memory backlog or recordings are discarded.
To prevent this from happening, we should use fast memory cards and also make the interval long enough that the camera can comfortably save between two shots. As memory cards I use either ExtremePro SD cards made by SanDisk * or the even much faster CFExpress cards from SanDisk *.
I use 30 seconds as the interval between exposures. Both exposures of 25 seconds or 20 seconds fit into this interval and give the camera enough storage time.
- With these settings I create 120 shots within an hour, which is enough for 4 seconds of 30p film. Too short for fitting into a reportage.
- With these settings I create 240 shots within two hours, which is enough for 8 seconds of 30p film. This amount of material might fit into a reportage.
- With these settings I create 360 shots within three hours, which is enough for 12 seconds of 30p film. This gives enough material for integrating it into a reportage and also fading in and out.
My photo equipment:
Nikon Z6 II full frame mirrorless camera: https://geni.us/vF5K4Nk *
Nikon D500 DX format SLR: https://geni.us/QpwK *
Wide angle for astrophotography: https://geni.us/PIPEGEB *
Wide angle for astrophotgraphy on DX camera: https://geni.us/rnztt4N *
Travel tripod: https://geni.us/fVJfG *
Large tripod: https://geni.us/lXGgv *
Always-on lens: https://geni.us/XIbn *
SD Memory Cards: https://geni.us/YWhyWuG *
CFExpress Memory Cards: https://geni.us/QNYEy4J *
Remote shutter release with interval timer: https://geni.us/eRSAm *
* All aforementioned links are Amazon affiliate links