
HDR Settings for Nikon D7500 on Usersettings „U1“ and „U2“

In this blog entry I’ll show you how to set up the Nikon D7500 so that you can create an exposure series for HDR photography. I will devide this tutorial in two sections: One for easily and fast shooting of HDR images free hand, another professional setting for shooting HDR images from a tripod mounted camera. We store all HDR-specific settings for each method in a separate usersetting bank „U1“ or „U2“ to recall all the settings easily and fast. So we will be able to switch between normal workflow and HDR workflow very quickly.
Settings for HDR recordings by free hand and from the tripod saved to usersetting bank „U1“
In order to be able to record HDR recordings free hand, we use the following settings on the quick memory bank „U1“. These settings are chosen so that the entire HDR series is recorded quickly and without long delays between shots. This prevents changes in the scenery caused by movement and thus ghost images. Settings for waiting times between two shots are reduced to a minimum and the mirror lock up is not used.

- 20,9 MP DX-CMOS-Filter ohne optischen Tiefpassfilter; 180k-Pixel-RGB-Belichtungsmesssensor; Expeed 5-Bildprozessor; ISO-Empfindlichkeit...
- 8 Bilder pro Sekunde maximale Serienbildgeschwindigkeit; 51 AF-Messfelder mit 15 Kreuzsensoren und Messfeldgruppensteuerung
General Camera settings
- Selecting the correct operating mode:
Turn the program selector wheel to „A”. - Adjust the correct aperture:
At this point I set aperture to “8” for HDR shots and change it according to the subject and environment. - Setting a suitable ISO number:
I’ll start here at ISO 400. - Activate the bracketing row:
Hold down the BKT button and use the rear control dial to set “5F” for 5-step bracketing. Enter the value “1.0” as the selection for the entire step size with the front e-dial.
Settings in the “Photo Shooting Menu”
- Optional: change folder names to HDR75 (this gives us our own directory for HDR photos)
- Optional: change file name to HDR (so we can easily distinguish HDR photos from “normal” photos by the file name)
- Flash control: TTL (no matter, because we don’t use flash anyway)
- Choose image area: DX
- Image quality: RAW
- Image size: L
- NEF (RAW) recording: Lossless Compression and 14-bit
- ISO sensitivity settings: ISO auto OFF, start at 100
- White balance: cloudy sky, so that always the same white balance is used during the bracketing row, the correct correction we carry out later at the PC.
- Manage Picture Control: NL (Neutral)
- Active D-Lighting: OFF
- Long exposure NR: OFF
- Vignette Control: OFF
- Auto distortion control: OFF
- Flicker reduction: OFF
- Auto Bracketing set: AE
- Multiple exposure: OFF
- HDR (high dynamic range): OFF
Note: We want to create an HDR ourselves from the individual shots later, if we used this option, the camera would assemble an HDR itself, without us having any influence on the final result. This function is only used by people who normally take photos with their smartphone. - Interval timer shooting: OFF
Keine Produkte gefunden.
Settings in “Custom configuration Menu”
We leave all settings on the default values except for the following settings mentioned here:
- Menu area C “Timers/ AE lock” – C3 self-timer – self-timer delay: 2
- Menu area C “Timers/ AE lock” – C3 self-timer – number of shots: 5
- Menu area C “Timers/ AE lock” – C3 self-timer – interval between shots: 0.5 seconds
- Menu area E “Bracketing & Flash” – E5 BKT order: N
Save settings permanently to Usersetting bank „U1“
In order to really save the settings we have made so far, we go back to the “SYSTEM” menu and select the memory bank „U1“ under the “Save User Settings” system menu item and confirm twice with “OK”.
If we now switch to another operating mode such as “A”, “M” or “S” or switch off the camera and then switch back to the „U1“ program, all our previously set data will be available again. Depending on the available light, we may have to adjust the exposure series properties to the lighting conditions.
Taking photos
We have now saved all settings and can make our recordings when we access the usersetting „U1“.
First we switch off the autofocus and focus manually, so that the focus does not change unintentionally during the exposure series.
When shooting with a tripod
First, turn off the image stabilizer if present on the lens. Switch to the self-timer. Now 5 shots are taken automatically within the configured exposure bracket with a lead time of 2 seconds. When HDR shooting is finished, simply switch back to A, M, S, or P mode.
When shooting free hand (without a tripod)
First, turn on the image stabilizer, if present on the lens. Switch to high speed mode CH. Now, while holding the shutter-release button down, 5 shots are taken in a row within the configured exposure bracket. When HDR shooting is finished, simply switch back to A, M, S, or P mode.

- Dieser Kamera Rucksack geeignet für DSLR Kamera mit aufgesetztem Objektiv bis 320mm, 4-6 weitere Objektive, Blitzgerät, Zubehör...
- Außenmaße: 44cm*28cm*14cm; Innenmaße: 41cm*27cm*13.5cm. Robust und wasserabweisend, zweifarbiges Nylon-Material
Professional settings for HDR recordings from tripod saved to usersetting bank „U2“
If we really have a lot of time to shoot our HDR exposure series and take pictures from a tripod, then we should use the full spectrum of HDR functions of the D7500 to get better pictures. To do this, we use the following settings on the „U2“ bank. These settings are chosen so that the complete HDR series is recorded with sufficient waiting times between the individual shots and the mirror lock-up, so that there is no shaking movement caused by vibrations of the tripod.
General Camera settings
- Selecting the correct operating mode:
Turn the program selector wheel to „A”. - Adjust the correct aperture:
At this point I set aperture to “8” for HDR shots and change it according to the subject and environment. - Setting a suitable ISO number:
I’ll start here at ISO 100. - Activate the bracketing row:
Hold down the BKT button and use the rear control dial to set “5F” for 5-step bracketing. Enter the value “1.0” as the selection for the entire step size with the front e-dial.
As an alternative to the 5F and 1.0 bracketing above, a 0.7 to 9 step increment (range -2.8 to +2.8) can be used for a wider coverage area with finer gradation between shots.
Settings in the “Photo Shooting Menu”
- Optional: change folder names to HDR75 (this gives us our own directory for HDR photos)
- Optional: change file name to HDR (so we can easily distinguish HDR photos from “normal” photos by the file name)
- Flash control: TTL (no matter, because we don’t use flash anyway)
- Choose image area: DX
- Image quality: RAW
- Image size: L
- NEF (RAW) recording: Lossless Compression and 14-bit
- ISO sensitivity settings: ISO auto OFF, start at 100
- White balance: cloudy sky, so that always the same white balance is used during the bracketing row, the correct correction we carry out later at the PC.
- Manage Picture Control: NL (Neutral)
- Active D-Lighting: OFF
- Long exposure NR: OFF
- Vignette Control: OFF
- Auto distortion control: OFF
- Flicker reduction: OFF
- Auto Bracketing set: AE
- Multiple exposure: OFF
- HDR (high dynamic range): OFF
Note: We want to create an HDR ourselves from the individual shots later, if we used this option, the camera would assemble an HDR itself, without us having any influence on the final result. This function is only used by people who normally take photos with their smartphone. - Interval timer shooting: OFF

- Mit dem Capture Camera Clip muss deine Kamera nie wieder in die Tasche, sondern ist jederzeit in Reichweite für das perfekte Foto...
- Vom Capture Clip lösen - und unmitelbar am Arca-Stativ einsetzen. Möglich dank der kompatiblen Schnellwechselplatte.
Settings in “Custom configuration Menu”
We leave all settings on the default values except for the following settings mentioned here:
- Menu area C “Timers/ AE lock” – C3 self-timer – self-timer delay: 2
- Menu area C “Timers/ AE lock” – C3 self-timer – number of shots: 5
- Menu area C “Timers/ AE lock” – C3 self-timer – interval between shots: 0.5 seconds
- Menu area E “Bracketing & Flash” – E5 Bracketing Order: N
- Menu area D “Shooting/Display” – D3 Exposure Delay Mode: ON with 2 seconds
- Optional: Menu area D “Shooting/Display” – D4 electronic Front-Curtain Shutter: ON (Use with caution. This can eliminate blur caused by the shutter motion, but should only be used with high-quality lenses. Better give it a try first, before using this feature productive.)
Save settings permanently to Usersetting bank „U2“
In order to really save the settings we have made so far, we go back to the “SYSTEM” menu and select the memory bank „U2“ under the “Save User Settings” system menu item and confirm twice with “OK”.
If we now switch to another operating mode such as “A”, “M” or “S” or switch off the camera and then switch back to the „U2“ program, all our previously set data will be available again. Depending on the available light, we may have to adjust the exposure series properties to the lighting conditions.
Take photos
As we only photograph from a tripod with these settings, we should switch off the image stabilizer if it is present on the lens. Now switch to the self-timer. Now 5 shots are automatically taken within the configured exposure bracket with a lead time of 2 seconds and a waiting time of 4 seconds between shots. The mirror lock up is used for the reduction of shaking movements. When the HDR recording is finished, simply switch back to A, M, S or P mode.

- DREI FESTE NDs, EIN VIELSEITIGES KIT | Das ND Stopper Kit ist mit einem ND8-Filter (3 Blendenstufen), einem ND64-Filter...
- GOBE | Alle Filter bieten hochwertiges optisches Glas aus Japan mit 24-lagiger Nano-Beschichtung, die für neutrale Farbbalance...
How to develop the HDR photo / Which Software to use
As a software for HDR merging I use Aurora HDR.
You can get yourself a free trial by clicking this link: https://skylum.evyy.net/pixelfriedhofaurorahdr
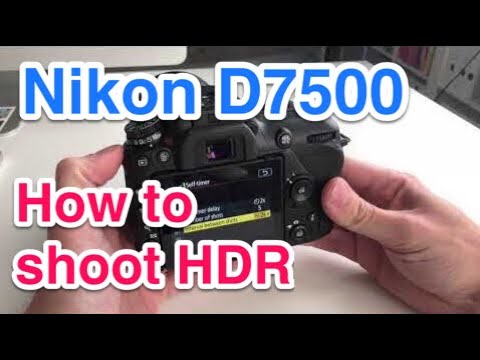
See all steps of the configuration in my video
Ihre Daten werden erst beim Abspielen des Youtube-Videos an den Dienst übermittelt. Your data will only be transmitted to the service when you play the Youtube video.
My first choice as a Lightroom alternative
I’m gonna do some advertising. I’ve been dealing with all kinds of image editing software for months, comparing a lot, testing a lot and finally choosing RAW developer and Lightroom alternative Luminar.
Have a look and try the free trial version. Just click on the banner:
All the links in this text are Amazon Affiliate Links, and by clicking on an affiliate link I will earn a percentage of your subsequent Amazon purchases. However, this circumstance does not influence the background of my product recommendation. This product recommendation is independent, honest and sincere.
Bei allen genannten Links handelt es sich um Amazon-Affiliate-Links. Durch einen Klick auf einen Affiliate-Link werde ich prozentual an Euren darauf folgenden Amazon-Einkäufen beteiligt. Dieser Umstand beeinflusst aber nicht die Hintergründe meiner Produktempfehlung. Diese Produktempfehlung erfolgt unabhängig, ehrlich und aufrichtig.


Jim Beard
Thank you for the highly organized and therefore compact presentation! And because you give reasons for your choices, the reader/viewer can choose how and whether to customize them. I am very pleased to have found such clear and useful assistance with HDR on the D7500.
Jerol Monroe
Thank you for helping with my D7500. This is an amazing amount of information and I appreciate that you have gone to this effort and detail.
Florian
Your comment that HDR is only used by people who shoot pictures with their phone comes across rather condescending and arrogant. Indeed, you cannot buy quick point and shoot cameras anymore because the market is wiped out by phones. And, there is nothing wrong going quick and easy either with a phone or with using HDR.
On the positive side, all this is quite helpful with one big caveat: when I push BKT I can switch HDR on and off but do not get to the settings for bracketing.
Being a nerd is fine, but when you want to help people why put them off?
Best,
Florian
RANJITH DE ALWIS
Many thanks. I learned lot.. Appreciate your service – Ranjith
Bruno Auclair
Merci beaucoup Daniel pour ce tutoriel, j’ai pris des photos absolument magnifiques en appliquant votre mode d’emploi, le D7500 est un appareil très puissant mais parfois complexe, merci de nous aider à mieux performer en photographie !