HDR Settings for Nikon Z6 and Z6 II on Usersettings „U1“ and „U2“
In this blog entry I’ll show you how to set up the Nikon Z6 and Z6 II so that you can create an exposure series for HDR photography. We store all HDR-specific settings for each method in a separate usersetting bank „U1“ or „U2“ to recall all the settings easily and fast. So we will be able to switch between normal workflow and HDR workflow very quickly.
Settings for HDR recordings by free hand and from the tripod saved to usersetting bank „U1“
In order to be able to record HDR recordings free hand and from tripod, we use the following settings on the User Setting bank „U1“. For freehand shooting we use the CH mode for fast continuous shooting, for touch-free and therefore shake-free shooting from a tripod we use the self-timer later. However, the following settings apply to both scenarios. With SLR cameras, there were dedicated settings for freehand and tripod, since with DSLRs we also used mechanisms such as mirror lock-up to reduce camera shake. With the mirrorless cameras of the Nikon Z-series, this is not necessary.
With the following settings, we will later take 5 images which will be combined to one HDR image.
If you prefer to create 7 images for a larger bandwidth instead of 5 images, you can put the alternative settings with 7 single images (marked blue) on the user setting bank U2. However, I recommend to take 7 single images only with a tripod.

- 20,9 MP DX-CMOS-Filter ohne optischen Tiefpassfilter; 180k-Pixel-RGB-Belichtungsmesssensor; Expeed 5-Bildprozessor; ISO-Empfindlichkeit...
- 8 Bilder pro Sekunde maximale Serienbildgeschwindigkeit; 51 AF-Messfelder mit 15 Kreuzsensoren und Messfeldgruppensteuerung
General Camera settings
- Selecting the correct operating mode:
Turn the program selector wheel to „A”. - Adjust the correct aperture:
At this point I set aperture to “8” for HDR shots and change it according to the subject and environment. - Setting a suitable ISO number:
I’ll start here at ISO 200.
Settings in the “Photo Shooting Menu”
- Optional: change folder names to HDRZ6 (this gives us our own directory for HDR photos)
- Optional: change file name to HDR (so we can easily distinguish HDR photos from “normal” photos by the file name)
- Choose image area: FX
- Image size: JPEG L and RAW L
- NEF (RAW) recording: Lossless Compression and 14-bit
- ISO sensitivity settings: ISO auto OFF, start at 100
- White balance: cloudy sky, so that always the same white balance is used during the bracketing row, the correct correction we carry out later at the PC.
- Manage Picture Control: NL (Neutral)
- Active D-Lighting: OFF
- Long exposure NR: OFF
- Vignette Control: OFF
- Diffraction compensation: OFF
- Auto distortion control: OFF
- Flicker reduction: OFF
- Metering: Matrix
- Skip flash control, flash mode and flash compensation, because we don’t use flash anyway
- Auto Bracketing set: AE (without flash)
Number of exposures 5F / alternatively 7F
Step size 1.0 - Multiple exposure: OFF
- HDR (high dynamic range): OFF
Note: We want to create an HDR ourselves from the individual shots later, if we used this option, the camera would assemble an HDR itself, without us having any influence on the final result. This function is only used by people who normally take photos with their smartphone. - Interval timer shooting: OFF
- Time-lapse movie: OFF
- Focus shift shooting: OFF
- Silent photography: OFF
Keine Produkte gefunden.
Settings in “Custom configuration Menu”
We leave all settings on the default values except for the following settings mentioned here:
- Menu area C “Timers/ AE lock” – C2 self-timer – self-timer delay: 2
- Menu area C “Timers/ AE lock” – C2 self-timer – number of shots: 5 / alternatively 7 shots
- Menu area C “Timers/ AE lock” – C2 self-timer – interval between shots: 0.5 seconds
- Menu area E “Bracketing & Flash” – E7 Bracketing order: N (MTR > under > over)
Save settings permanently to Usersetting bank „U1“
In order to really save the settings we have made so far, we go back to the “SYSTEM” menu and select the memory bank „U1“ under the “Save User Settings” system menu item and confirm twice with “OK”.
If we now switch to another operating mode such as “A”, “M” or “S” or switch off the camera and then switch back to the „U1“ program, all our previously set data will be available again. Depending on the available light, we may have to adjust the exposure series properties to the lighting conditions.
Taking photos
We have now saved all settings and can make our recordings when we access the usersetting „U1“.
First we switch off the autofocus and focus manually, so that the focus does not change unintentionally during the exposure series.
When shooting with a tripod
First, turn off the image stabilizer if present on the lens. Switch to the self-timer. Now 5 shots (or alternatively 7 shots) are taken automatically within the configured exposure bracket with a lead time of 2 seconds. When HDR shooting is finished, simply switch back to A, M, S, or P mode.
When shooting free hand (without a tripod)
First, turn on the image stabilizer, if present on the lens. Switch to high speed mode CH. Now, while holding the shutter-release button down, 5 shots are taken in a row within the configured exposure bracket. When HDR shooting is finished, simply switch back to A, M, S, or P mode.

- Dieser Kamera Rucksack geeignet für DSLR Kamera mit aufgesetztem Objektiv bis 320mm, 4-6 weitere Objektive, Blitzgerät, Zubehör...
- Außenmaße: 44cm*28cm*14cm; Innenmaße: 41cm*27cm*13.5cm. Robust und wasserabweisend, zweifarbiges Nylon-Material
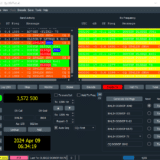
How to develop the HDR photo / Which Software to use
As a software for HDR merging I use Aurora HDR.
You can get yourself a free trial by clicking this link: https://skylum.evyy.net/pixelfriedhofaurorahdr
See all steps of the configuration in my video
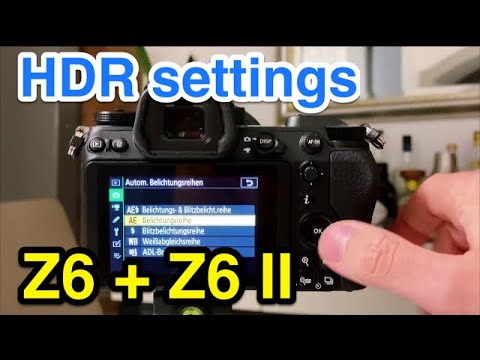
Ihre Daten werden erst beim Abspielen des Youtube-Videos an den Dienst übermittelt. Your data will only be transmitted to the service when you play the Youtube video.
Camera-Carrying-System Peak Design Capture Clip v3: https://geni.us/KFxtYmM (Amazon Affiliate Link)
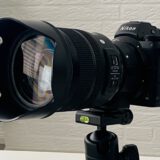
Sigma 24-70mm 2.8: https://geni.us/pKt2sbG (Amazon Affiliate Link)
Sigma 105mm 2.8 Macro: https://geni.us/ADMHVq6 (Amazon Affiliate Link)
Sigma 150-600mm: https://geni.us/xJ3A3 (Amazon Affiliate Link)
Sigma 18-35mm 1.8: https://geni.us/rnztt4N (Amazon Affiliate Link)
All the links in this text are Amazon Affiliate Links, and by clicking on an affiliate link I will earn a percentage of your subsequent Amazon purchases. However, this circumstance does not influence the background of my product recommendation. This product recommendation is independent, honest and sincere.
Bei allen genannten Links handelt es sich um Amazon-Affiliate-Links. Durch einen Klick auf einen Affiliate-Link werde ich prozentual an Euren darauf folgenden Amazon-Einkäufen beteiligt. Dieser Umstand beeinflusst aber nicht die Hintergründe meiner Produktempfehlung. Diese Produktempfehlung erfolgt unabhängig, ehrlich und aufrichtig.