
Varnish teak garden furniture: Options and result
Chairs or tables made of teak do not necessarily have to be painted or varnished. Many people swear by oiling garden furniture. But despite oiling, the furniture ages and quickly turns grey. With varnishes, you can prevent the ageing process and make the furniture last longer. We show how we have varnished our garden furniture.
For three years we only oiled our teak furniture. But by autumn at the latest, the furniture had turned grey again and the wood was badly affected by moisture and weather. In spring, the big restoration started: sanding, oiling, drying. Quite an effort, the result of which only lasted a few months and never came close to the rich colours when the furniture was delivered anyway. For this reason, we decided to paint our teak furniture.

I know clear boat varnish from other woodwork projects and wooden ships. This varnish is water-resistant, largely insensitive to sunlight (or at least more insensitive than some other paints or varnishes) and provides optimum protection against moisture. After all, this varnish is used to varnish wooden boats that even spend their lives in salt water. Because of these properties, we have decided to lacquer our teak furniture with precisely this boat lacquer.
First we sanded our furniture properly. First with a coarse 40 grit sandpaper, then with a 100 grit and finally with a fine 180 grit sandpaper. We removed all the grey residue and the tables and bench are as smooth as a baby’s bottom.

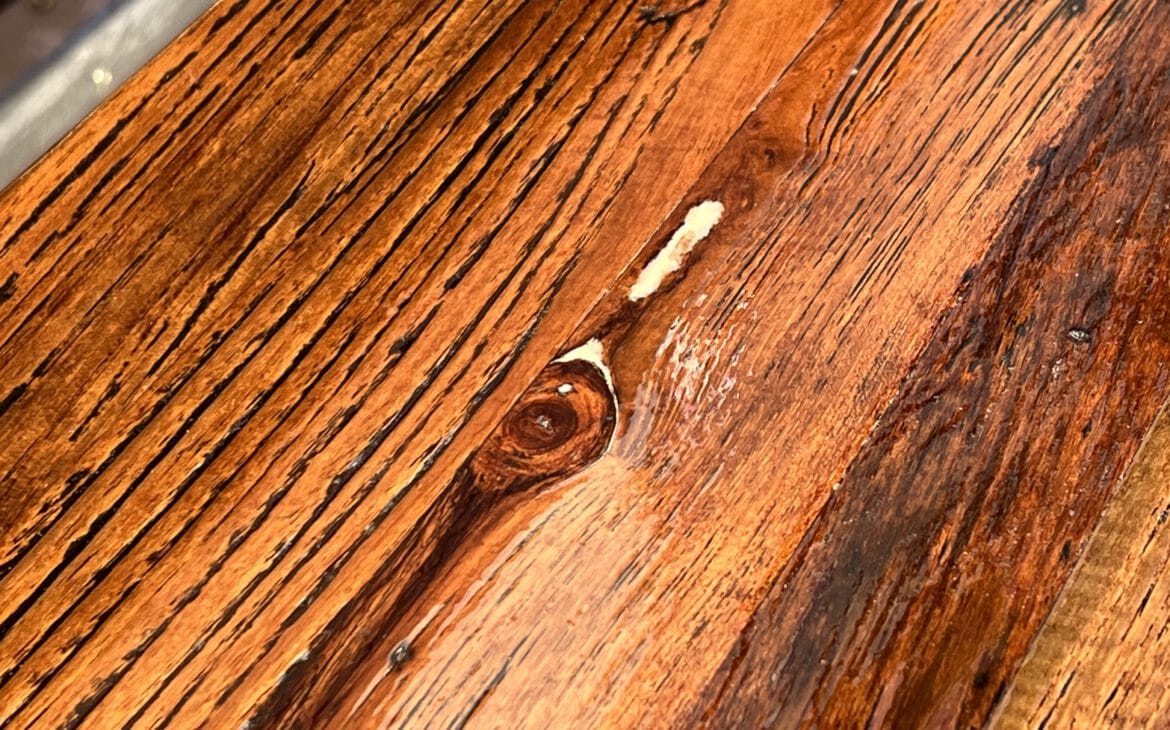
Now there were already some small cracks or holes in our wood, which we sealed with Molto wood filler * in the next work step. We then sanded the dried filler again.

For the varnish, we chose the high-gloss boat varnish from Bondex *. A good tip: Bondex is not the cheapest varnish, but the quality is worth the price in our eyes. Do yourself a favour and don’t buy no-name China rubbish, then the chances are good that you will enjoy the paint for a long time. If you buy low-quality paint, you can be sure that it will weather just as quickly as the oil and will still require a lot of maintenance. I speak from experience.

- HOCHWERTIGER SCHUTZ - Bondex Bootslack bietet einen hervorragenden Schutz vor Wasser, UV-Strahlung, Salzwasser, Verschleiß und anderen...
- UV-SCHUTZ - Die Lackierung enthält UV-Filter, die das Boot vor schädlicher UV-Strahlung schützen. Dies hilft, das Ausbleichen der...
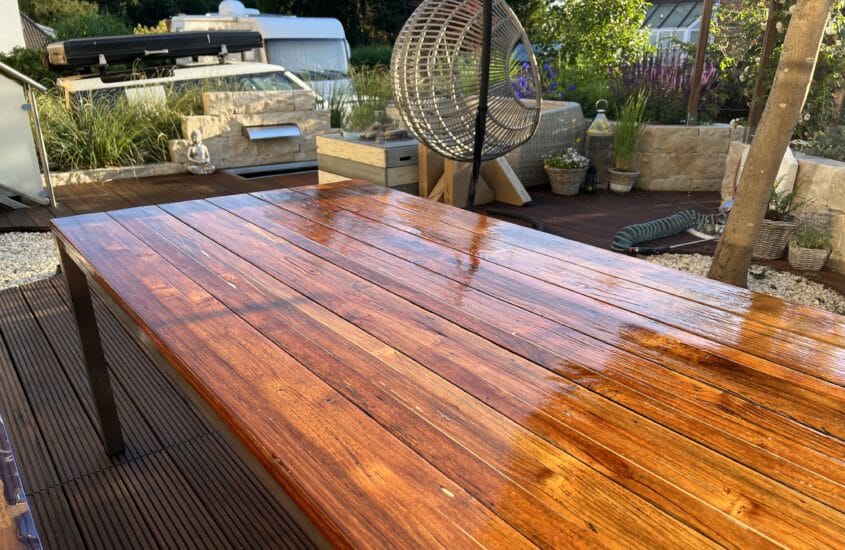
Before painting, we remove all dust from all surfaces to be painted using compressed air and a microfibre cloth. We start with the first coat of paint and apply it quite thickly with a brush. We make sure that the paint also penetrates into small recesses and crevices and that small air bubbles are neatly brushed out. Already during the lacquering process, we notice that the lacquer fully expresses the reddish, rich colouring of the wood.
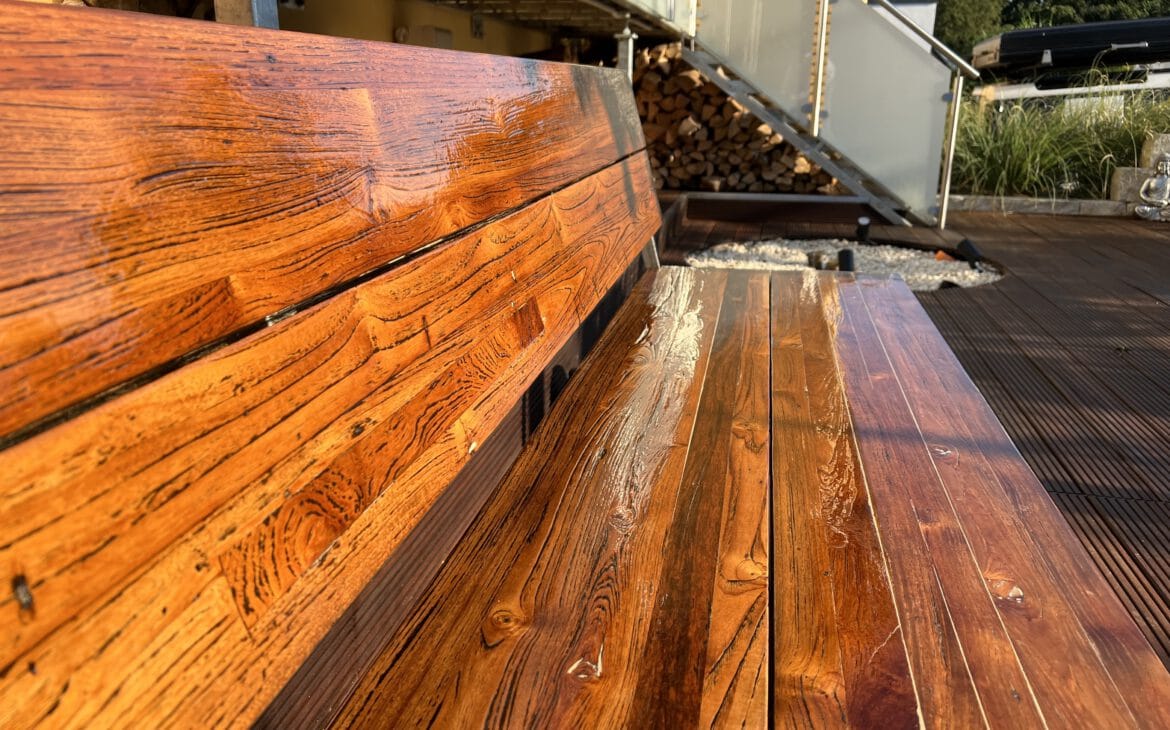
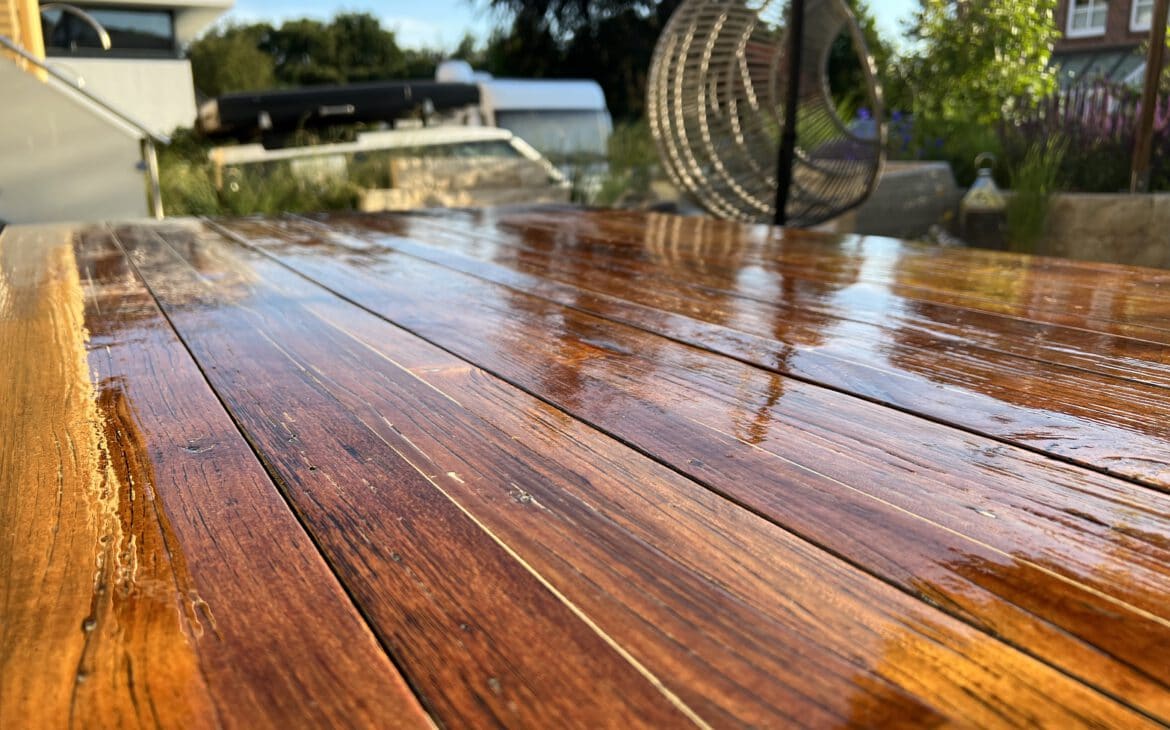
After approx. 24 hours, the first coat is completely dry. Now we sand the dried, first coat of paint again by hand with a fine 180 grit sandpaper to remove small irregularities and rough spots. Again, we remove the sanding dust with compressed air and a microfibre cloth.
The second and third coat will follow in the next few days. When the third coat has been applied, a thick layer of varnish will protect our wood from dirt and moisture.
* All links marked with an asterisk are Amazon affiliate links. We receive a percentage of the purchases made through them. Our recommendations are nevertheless honest and sincere.